Saturday: Assembly — Ethan

A third short but efficient and transformative day in the shop. With finish applied to all non-gluing surfaces, Mom and I determined in what order things would be glued and assembled so that it all fit together, and then we went ahead and did it.

I think I’ll let the table and shelf speak for themselves:

IMG_0914  IMG_0916IMG_0918  IMG_0922

From here, all that’s left is to continue applying polyurethane (the second finish) to both pieces, insert the wedges into the tops of the legs, sand them flush, continue applying polyurethane, clean up any glue that might have dried in inopportune places, continue applying polyurethane, and move the whole thing into the Tiny House. I expect to write about that in my last blog post. There’s also the matter of “signing” the table in some way, but I’ve only just begun to think about that — I have no doubt it will come along on its own eventually.

It seems like the table has taken shape on its own in the last few days, and I’m beyond pleased with how it looks now. It’s fun to imagine who will end up using it when they stay in the Tiny House — a table and shelf made from walnut sourced from the campus, continuing to serve an important function, if in a slightly unexpected way.


— EDM


Friday: Sanding and Finishing — Ethan

Another relatively short day in the shop, but again, successful and efficient. I’d guess I’ve completed about two thirds of the grunt work as far as power-sanding everything down, and today felt especially productive because I was moving back and forth periodically between the main room of the shop, outside (the free ventilation was a major upside), and the finishing room. The first coat of finish I applied was just a simple dilution of tung oil (with a nice citrus-y smell), and the walnut transformed before my eyes into its distinctive dark and rich finished form. Walnut always surprises me with just how much it changes with finish.


Currently sitting finished and awaiting assembly are three of the legs (the fourth is waiting on glue to dry that is filling some checks in the wood), the tray that will live under the table, and the large shelf that will live on the wall above the table. Tomorrow’s work will be sanding the slab tabletop itself, the final leg, and finally, finally, finally, gluing and assembly.


— EDM


IMG_0902

Tray and three legs finished

Thursday: Notching, Relieving, and Assembly — Ethan

Only about three hours spent in the shop today, but lots of important work finished before the long process of carefully sanding down each surface to smooth, shiny, and then soft — if you can imagine “soft” wood — and applying about half a dozen coats of finish.

The main focus was on the legs today. With mortise and through-tenon joints, a wedge is usually inserted into the through-tenon in order to hold the joint in place using the force of friction in the wood instead of relying on glue. Two features in the tenon make this possible: a “notch” that is cut into the top of the tenon, usually with a bandsaw (which I used) or a coping saw; and a “relief hole” that is made at the base of the notch (with a drill press, in my case), which enables the wood fibers to take the stress of the wedge without continuing to split beyond the desired length. If you recall my previous post — in which I tapered the legs from a 2.25″ square to a 1.75″ square — that process left eight thin wedge-shaped pieces of wood that will likely be well suited as the wedges for my tenons.

The final step before sanding was to re-saw the joint for leg D on the tray that will sit under the tabletop, and make a cut across the board to line up the end with legs B and D (at the far end of the bottom picture). With that done, I began sanding the bottom face of the tray; for large surfaces such as the tray, I use the shop’s power sander, which gets the job done, but it takes a lot out of you physically, and the combined noise of the sander and the vacuum attached to it begins to grate on you after an hour or so.

IMG_0894 IMG_0882

IMG_0896IMG_0895

From here, I see lots and lots and lots of sanding in the next few days, gluing and assembly(!), and after that, I’ll be spending my free periods this coming week applying coats of tung oil and polyurethane.

My next few posts will be more retrospective/reflective in focus, as I wrap up this nearly 3-week-long project — until then.


— EDM

Wednesday, Thursday: Tapering and Coping Saw-ing — Ethan

The work for these two days was without question the most stressful I’ve done so far. Now that I have the four legs fitted and square to the floor, it was time to cut sections into the tray which the legs will fit through, in addition to their mortises in the table top. Needless to say, they have to be precisely measured and cut — the right tool for that turned out to be the coping saw, which I’d never used before.

A bit apprehensive at first (because of the whole using a tool for the first time for a key part of the project), I managed to get the hang of keeping my blade square in two and sometimes three dimensions at once and very carefully carving out large, not-easily-replaceable chunks of wood.

I have to say I’m not disappointed in how well I did; after two days of on-and-off work with the coping saw and the sanding block for finer work, I have legs A, B, and C fitted more or less how I want them to sit in the final arrangement. Leg D suffered from some mis-measuring, but after this weekend (I’ll be away at Springside Chestnut Hill volunteering at the robotics competition there) I plan to sort out the final leg’s shape in the tray and look at the whole assembly for the first time!

As my “breaks” from working on the tray, I further sanded the large shelf that will live up above the table. It was busywork that didn’t require much thinking, just to take a mental breath and reset.


As if that wasn’t enough cortisol in my system, it was also finally time to taper the legs. That was a process; taking off half an inch of width over a two foot length from the inside two faces of each leg is not a large angle, and Mom and I really had to think through how we were going to maintain the angle, and how to push the whole assembly through the table saw, and all the right forces to put on the wood as we were sliding it through the blade… We got them all done, though, and I was surprised at how the legs went from substantial in a blocky way to substantial in a delicate way. They now fit the scale of the table and they even look elegant, which I’m very pleased with.

Another day or two and I’ll have the tray completed, the wedges driven into the tenons of the legs, and then it’ll be time for a mass sanding and mass finishing. This is the exciting part of the process for me — I can see the end.


Until next time,

— EDM


Two pictures of legs A and C, which are fit into the tabletop and the tray; one of the large shelf for up above.

Tuesday: It stands!

Day four of work on this table, and it stands beautifully!

Today’s work was to level out the four legs so that the tabletop would rest at 30 inches off the ground, a standard working desk height. This was a relatively simple matter of measuring 28.75″ from the “shoulder” (at the top of the leg, but just before the narrowing to the tenon) and pushing them through the table saw. Even so, it was gratifying to see this table come together and take physical shape.

IMG_0835

The other matter of the day was cutting notches in the four legs using the wider dado blade so that they could accept the 1/2″ thickness of the shelf that will live below the tabletop as a practical resting place for books, papers, a computer, or even a set of utensils for a dining setup.

Here they are, all lined up and pretty . . .

IMG_0832


. . . and here is the whole assembly!

IMG_0834

Of course, the legs will eventually be inset completely in the shelf and they will each be precisely spaced so that each tenons fits into its respective mortise in the tabletop. That’s work for tomorrow, though.


Short day in the shop, short post for the blog — tomorrow will likely be the same.

— EDM

Thursday: A Tray and a Table in Progress — Ethan

I finished the legs!

The first order of business today was to carefully clean up the third mortise after having glued it up over 2 nights and fit its leg into the joint. Then I moved on to the fourth and final tenon. This one was comparatively simple to shape and fit, and I think it’s how I’ll prefer to do mortise and tenon joints from now on.

See, how mortise and tenon joints are supposed to be done is the opposite way from my situation: the tenon is cut, typically with a dado blade (a wider version-blade of a table saw that doesn’t leave a vee in the wood it cuts), and then the mortise is cut with a chisel to match the dimensions of the tenon. Because I’m working on a table with pre-cut mortises, I had been working with the opposite logic, tailoring my tenons to match the mortises.

For this leg, however, I made even cuts off of all four sides of the leg — 11/32″ off each face along a 1 1/4″ length — and then did some fine chisel work to match the mortise to the tenon.

Here are the completed legs in their respective holes, along with a few other shots:

IMG_0783   IMG_0780

IMG_0786


I’m very like my mom in the shop in that when I need something that requires 100% of my focus — planning dimensions to cut a tenon, for example — it can only be us in the shop. Because we had a double period of the upper school class as well as a middle school sculpture class in here today, I had lots of time for busywork. Today, that meant planing the glue off of the shelf (which had been glued up on Tuesday), power-sanding the top surface for about an hour, and filling checks and cracks in the wood with dark-drying wood glue.

IMG_0787     IMG_0788


The next day I’ll be in the shop will probably be Saturday, and next steps will be to square up the legs, make cuts on the legs and this tray, and taper the legs themselves.

— EDM

Tuesday: Chip-outs and Clamps — Ethan

The everlasting truth of wood is that you can always take more off, but it’s much harder to add some back.

Today was an exercise in recovering and strategizing after a series of minor but consequential mistakes. Monday had one of those mistakes as well: in cutting my tenon on one table leg, I took the wrong amount off of the sides (instead of taking it off the front and back) and so I had to leave that until today with two thin pieces of walnut glued to the sides and drying overnight. After today, however, apart from those who read this, my mom, and myself, no one will ever know; the wood was forgiving this time, and the difference is barely perceptible, even if you look for it.

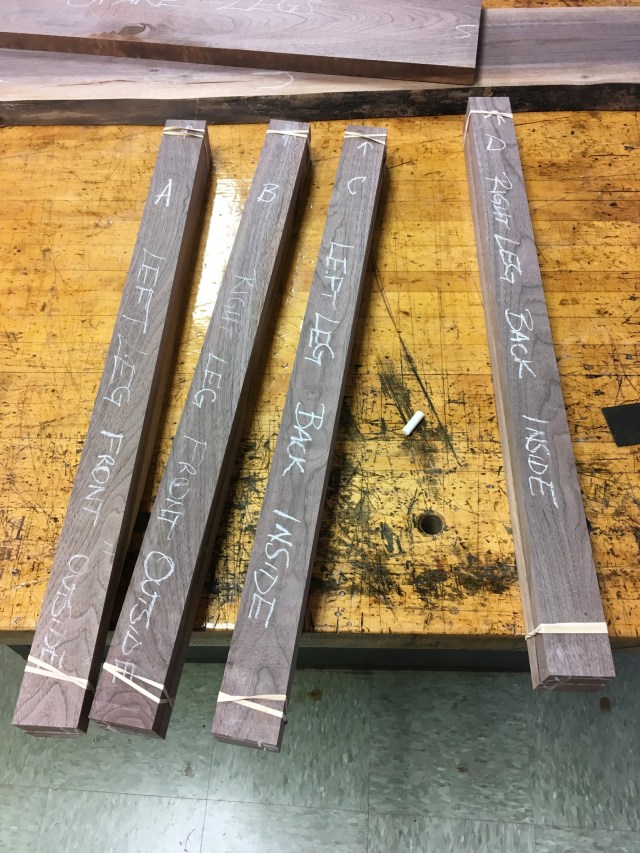
You know, you can imagine what could go wrong all you want, but sometimes its the simplest thing that gets you. As I moved on to my third leg, I was positive I could not make a mistake — I had measured perfectly, the walls of my mortise were as good as I could get them, I had got my notation for cutting the tenon down…. and then I took wood off the bottom instead of the top.  The fix for that that my mom worked out was that, because we intentionally made the legs longer than they needed to be (for precisely this sort of situation) we’d cut the 1 3/8″ right off the bottom, and if we needed extra length, we’d add the appropriate amount of material in time. Again, not an unrecoverable blunder.

—————

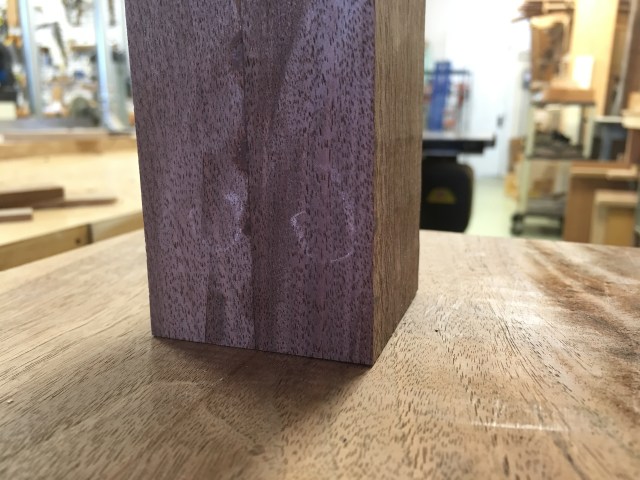
When it comes to mortises, you can never be absolutely sure, even in a relatively straight-and-predictably-grained wood like walnut, of absolute consistency in the fibers. The bottom picture shows the unfortunate result of an imperfection in the wood (I believe it was a series of gaps in the growth of the tree, resulting in wood fibers that were less rigid and had more space to more around) translating to a large chip-out as I cut that wall of the mortise. Fortunately, we were able to find the renegade chips, and they’re currently clamped up and gluing back in place.

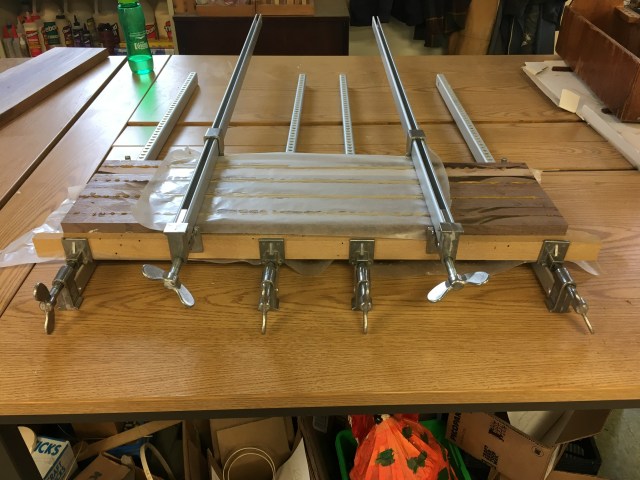
Mom and I had been talking about possibilities for “stretchers” for the table legs — horizontal crosspieces that link the legs to one another and strengthen them — and we  came to an interesting solution. The top right photo shows a whole bunch of clamps, and three long pieces of walnut glued up and drying, measuring about 16.5″ by 4′. This assembly will eventually serve as both a structural and practical element: it will be linked into the four legs, but it will sit only about 5 or 6 inches below the tabletop, serving a similar function to the trays underneath the desks in main hall dorms.


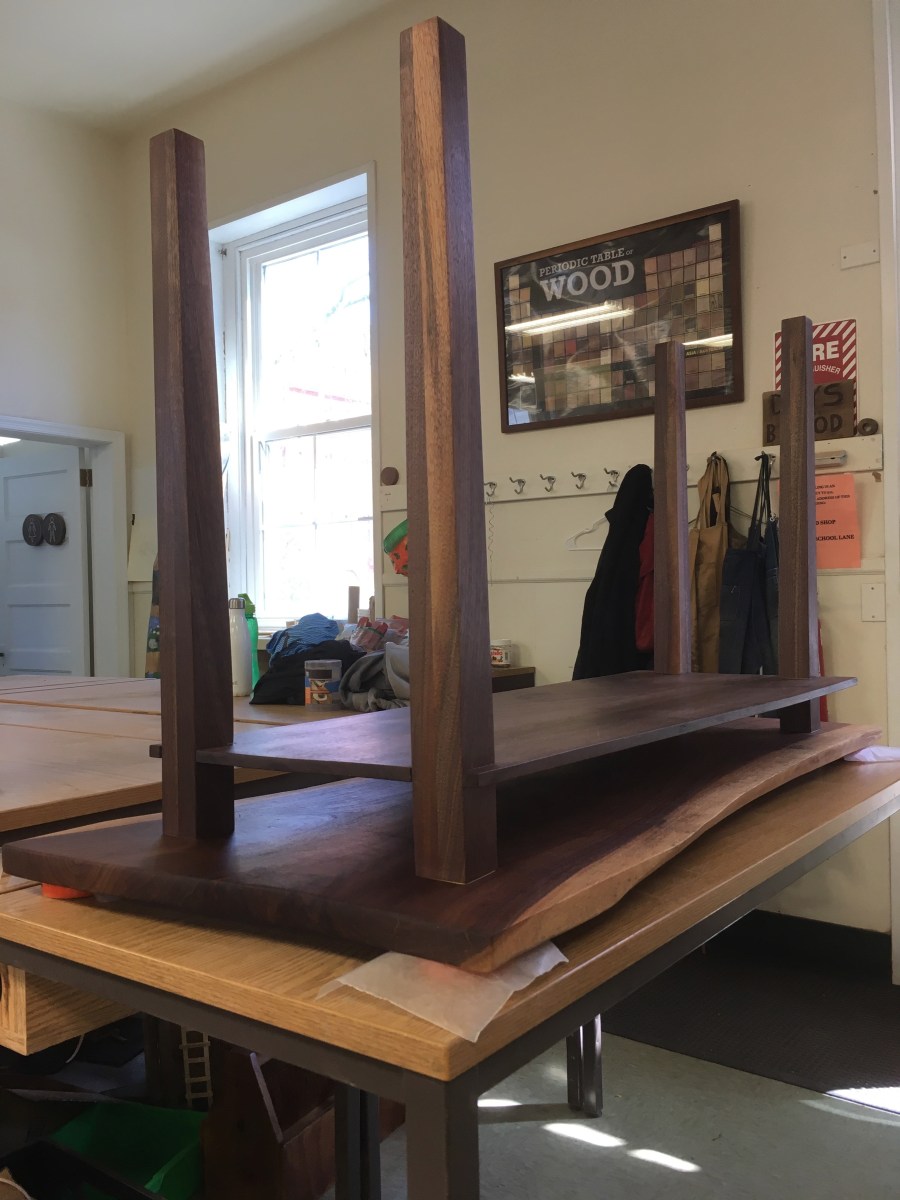
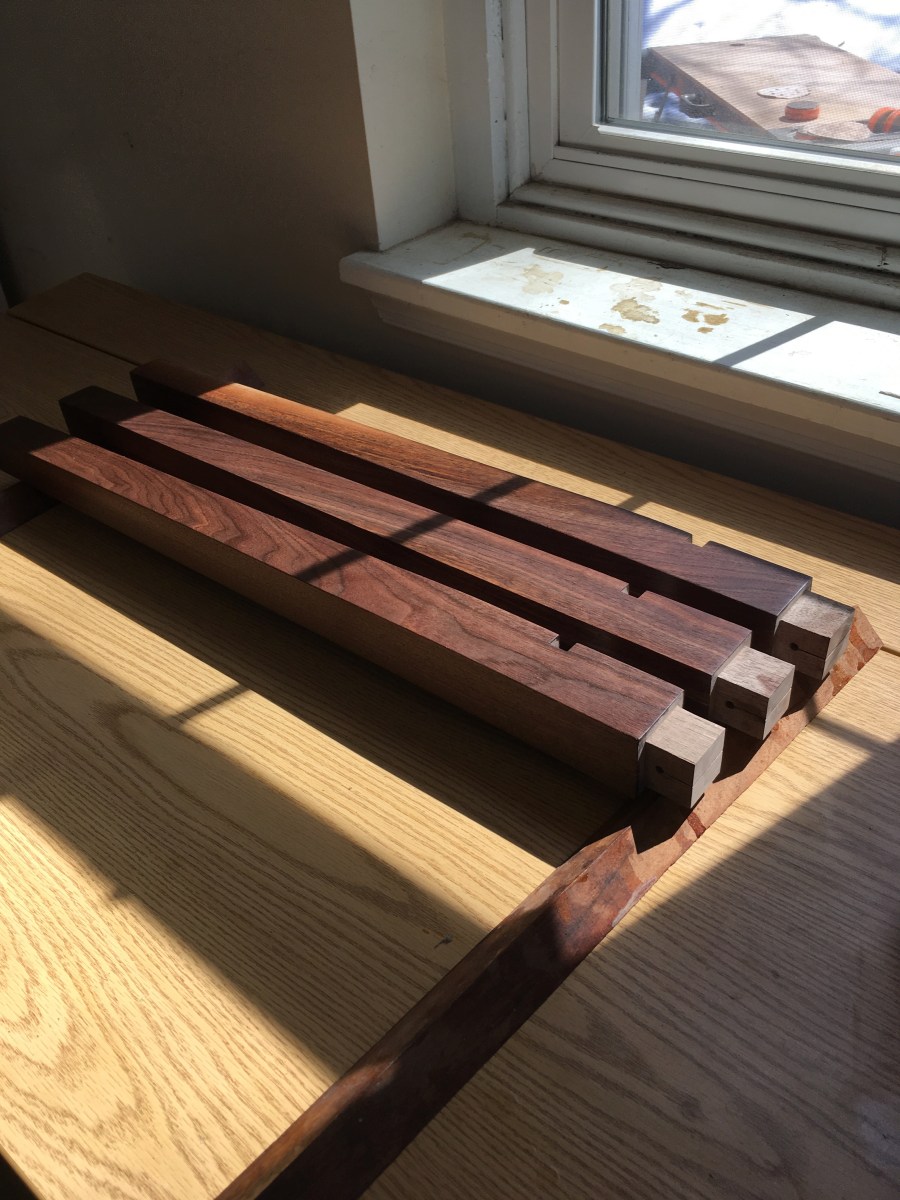
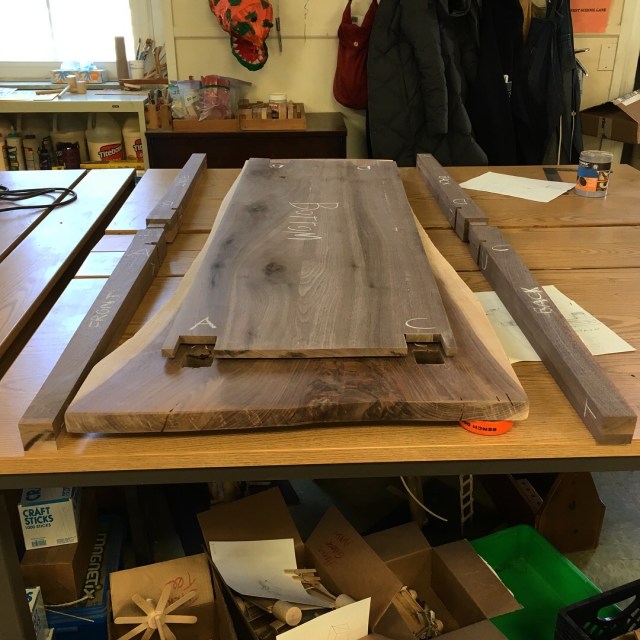
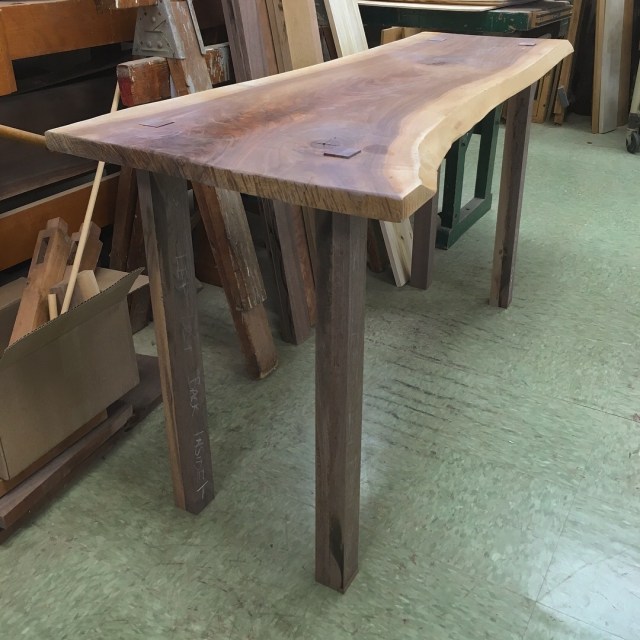
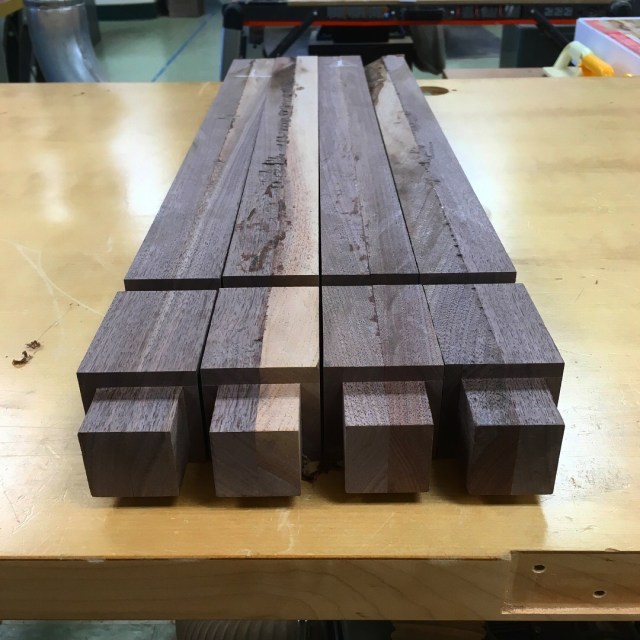
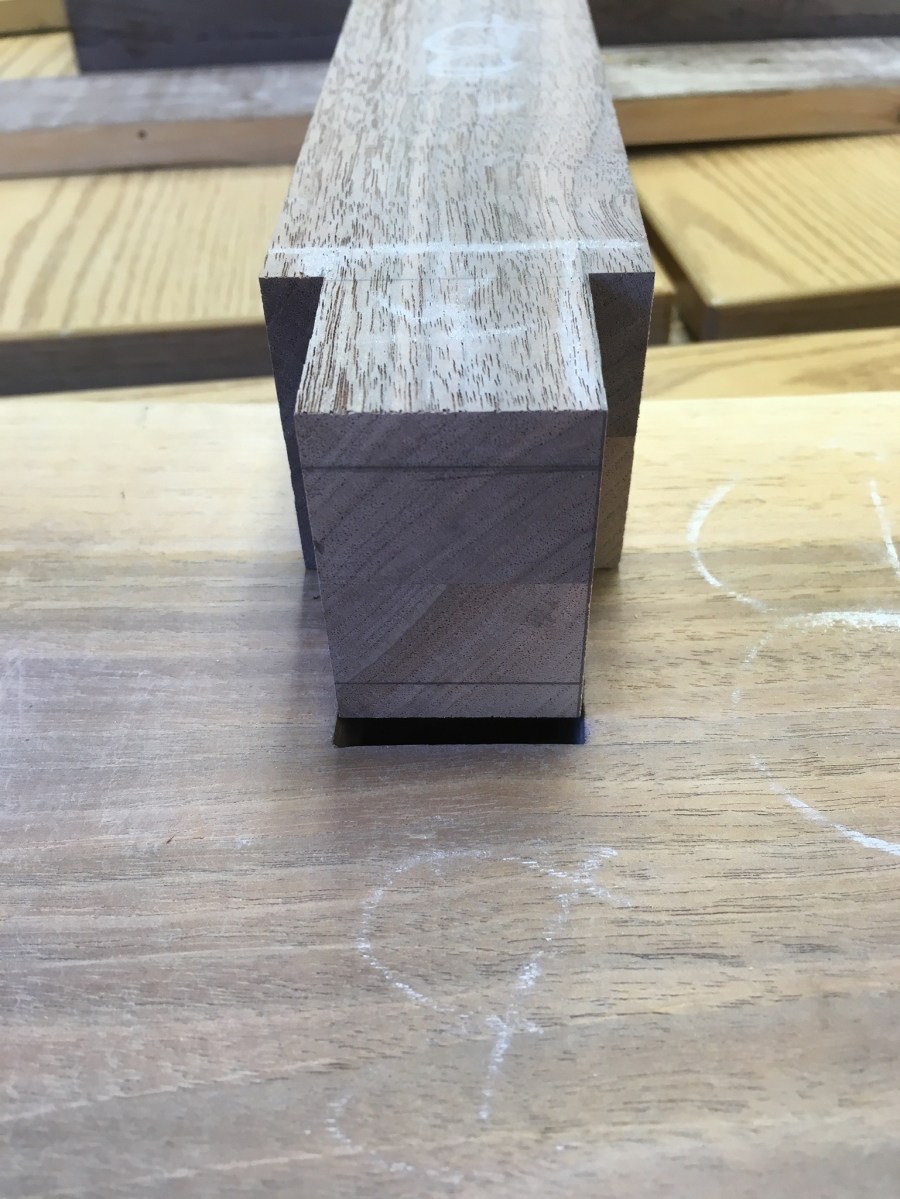
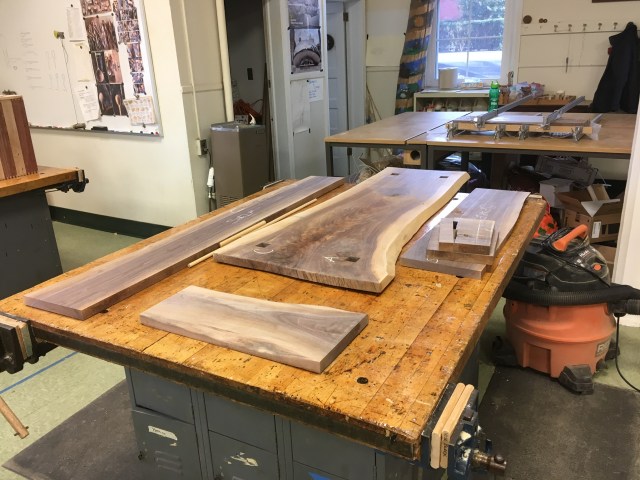
In sum, the tenon count is up to 3, with 2 perfect dry-fits (bottom photo), the shelf is glued up and drying (middle right), and even though there’ll likely be a snow day tomorrow, I’ve taken two small boards home with me so I can work on sanding them.

That’s all for today — I plan to finish the legs on Thursday and begin work on designing the joints for the stretcher/shelf.


— EDM

Monday: a Tale of Two Tenons — Ethan

Working in the woodshop has a very laid-back ness to it — today I came in a little before 8:00, worked around a band 2 class, took a break at around 11 to go for a run, got lunch in the dining hall — reveling in my lack of classes — and came back to work for another two hours before packing up and heading home. I suppose that’s just as well, because the work I’m doing now is itself very intense and precise; I experienced both edges of that sword today.

Continue reading “Monday: a Tale of Two Tenons — Ethan”

Furnishing the Tiny House — Ethan

Hello everyone! My name is Ethan McLear.

I’ve chosen to remain local for my senior project — I’m working in the school’s woodshop to fill a space that was created by seniors of 3 years ago: our on-campus Tiny House. The layout for its interior space has gone through several iterations, always with the intention of using the space as efficiently, naturally, and sustainably as possible, and it’s my hope to contribute to this essentialist living space.


In outlining my goals for this project back in October, I found that I could best articulate them in terms of the framework for leadership developed by the National Outdoor Leadership School. As part of their 4-7-1 model, there are seven leadership skills:

Expedition Behavior // Competence

Communication // Judgment and Decisionmaking

Tolerance to Adversity // Self-Awareness // Vision & Action

My six goals, built on those leadership skills, are:

  1. Improved skill in craft —This is the umbrella objective I hope to achieve; the objectives listed below fit under this general goal, but each merit further explanation.
  2. Articulation of process (Vision and Action / Communication) — I’ll need to clearly lay out a plan of construction, and have confidence in that plan leading to a finished product I’d be proud of.
  3. Adherence to process (Competence / Judgement and Decision Making / Tolerance to Adversity / Vision and Action) — Just as important as the plan itself is my ability to remain on-course and carry out the plan we’ve agreed upon. This might entail having to revise minor aspects or it may mean branching off in a completely new direction.
  4. Personal responsibility in a shop environment (Self Awareness) — I’ve spent plenty of time between the D&E Lab, the Woodshop, and the Theater Scene Shop, and in all of those shop environments, personal responsibility and awareness are critical.
  5. Improving an existing space on campus (Vision and Action) — Whatever the function of my piece, and wherever it lives, my hope is that what I create will be utilized and appreciated.
  6. Leaving a mark (Competence / Vision and Action) — I suppose I’m playing into the natural human tendency to want to leave behind a memento by which I’ll be remembered, but I guess there’s also a reason why this tendency is basically universal in people.


As I’ve already had nearly two full days of work, I’m writing a bit behind schedule, but I’ll make up for that with pictures!

  1. Walnut tabletop, with two mortises (holes) completed to satisfaction, two still to goIMG_0687.jpg
  2. Long walnut board, material for table legsIMG_0006
  3. Potential shelf spaceIMG_0007
  4. Shelf / serving board, pre-separationIMG_0008
  5. Four legs, cut into eight 1×2 lengths, paired according to grain flow, pre-gluingIMG_0011
  6. Legs clamped and glued up, setting overnightIMG_0013
  7. Serving board (currently thinking about feet for this one)IMG_0015
  8. Everything all together: from left to right, long shelf, serving board, tabletop, refuse/spare leg material, legs glued together and drying.IMG_0017


Most of my work will happen in this coming week, so I expect to be posting daily until at least this time next week. Lots more to come!


— EDM